In this exercise we will see how to delineate the boundary of a catchment/contributing area using a Digital Elevation Model and a given point (a specific point for which we want to find the contributing/catchment area). ArcGIS can obtain the total area of flowing into this specific point, also called pour point. In order to obtain the watershed delineation we will need to follow some predefined steps and obtain the Flow direction and the Flow accumulation and obtain the for each cell in the DEM the number of cells that are flowing into them.
The Flow Accumulation output raster will allow the delineation of the draining area to any specified point. Preferably the points we wish to use as input for the delimitation of a contributing area should be located along the stream definition (drainage network) determined by the flow accumulation raster output.
Recommended workflow:
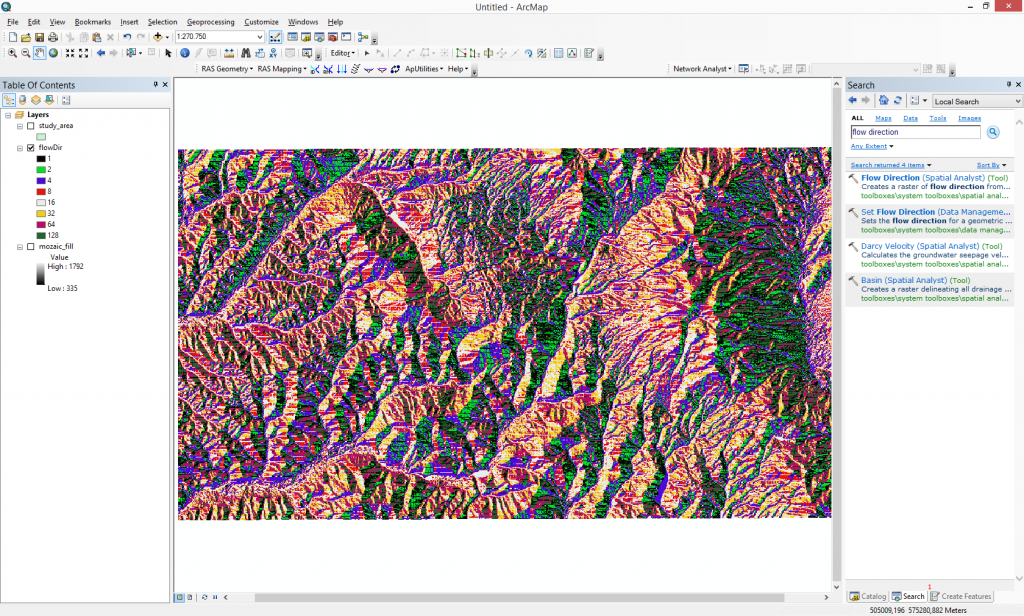
Step 1: Fill sinks – this tool will fill the sinks in your DEM creating a depressionless DEM.
Step 2: Flow direction – this tool will calculate the flow direction of each cell in the raster. There are eight valid output directions.
Step 3: Flow accumulation – calculates for each cell in the DEM the number of cells that are flowing into them.
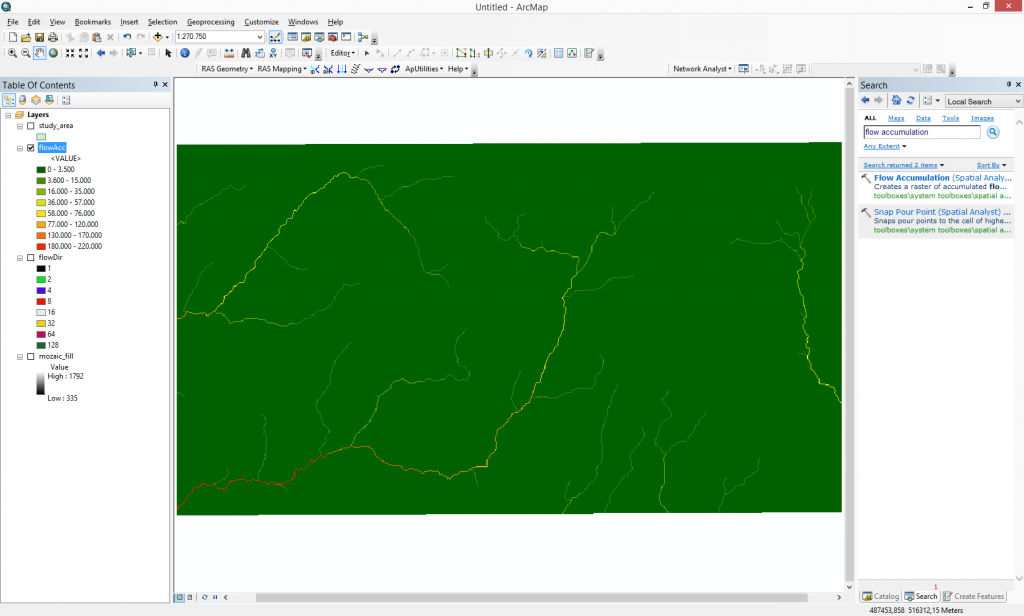
Step 4: As the flow accumulation grid was outputted we can determine the drainage network of the area and where the most of the water will be accumulated.
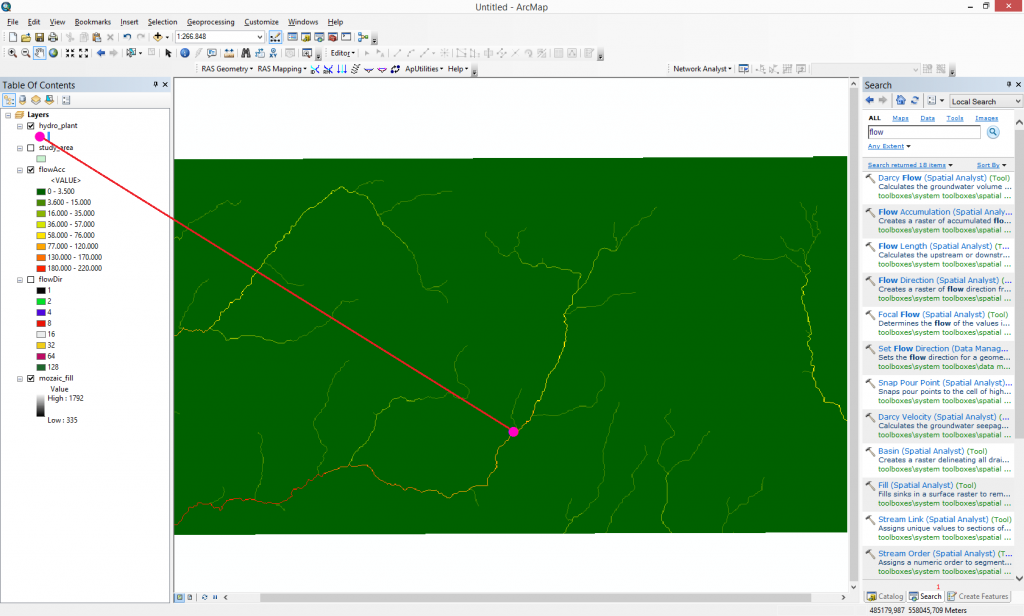
Now we can establish a point along the high value accumulation cells for which we will delineate the contributing/catchment area. Create a new shapefile and define a new point vector layer. We will consider this point as a new hydroelectric power plant. Given this we would like to know which is the catchment area the new hydroelectric power plant will collect the water. This is very important from the precipitation values point of view.
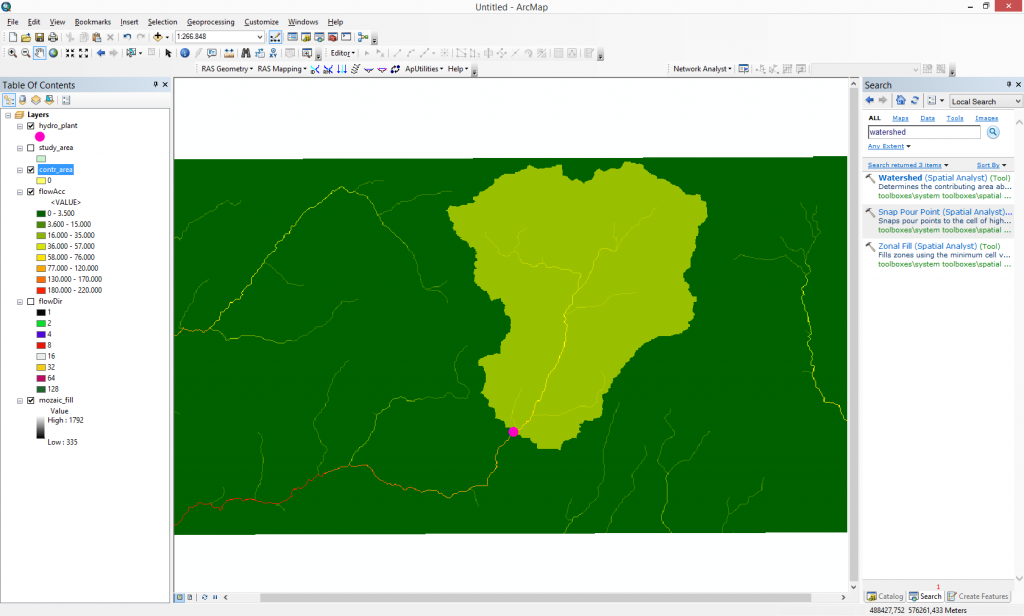
Step 5: Watershed – Finally we obtain the contributing area to a point using the Watershed tool.
Quality training taught by professionals
RECOMMENDED COURSE


Leave A Comment