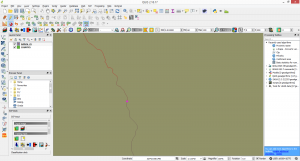
For this exercise please use QGIS version 2.18.
Various vector layers and tables (OGR, SpatiaLite, PostGIS, MSSQL Spatial or Oracle Spatial) can be edited in QGIS. Before you start a editing session in QGIS, make sure you set the right snapping options (Snapping Tolerance and Search Radius). In QGIS you can find these options in Settings > Options > Digitizing or in Settings > Snapping Options. This will optimize the editing process of the layers.
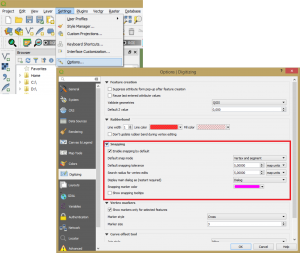
Make sure you check the Default snap mode to > Vertex and segment.
For Default snapping tolerance and Search radius for vertex edits select a value and from the drop down menu set the values to map units. After you set these parameters you can proceed with your edit process.
In order to start editing a vector layer the next steps are recommended:
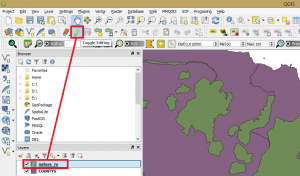
- Select the vector you wish to edit by clicking it.
- Go to Toggle Editing and start a new edit session.
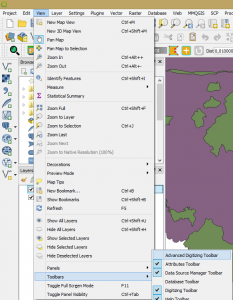
- Activate the Advanced Digitizing toolbar. Go to View > Toolbars > Advanced Digitizing Toolbar. The new toolbar is opened.

Using the basic editing tools you can perform operations like:
| Icon | Purpose | Icon | Purpose |
|---|---|---|---|
 |
Current edits |  |
Toggle editing |
 |
Add Feature: Capture Point |  |
Add Feature: Capture Line |
 |
Add Feature: Capture Polygon |  |
Move Feature |
 |
Add Circular String |  |
Add Circular String By Radius |
 |
Vertex tool | Delete Selected | |
 |
Cut Features |  |
Copy Features |
 |
Paste Features |  |
Save layer edits |
The Advanced digitizing and editing tools enhance the capabilities of QGIS performing operations lik
| Icon | Purpose | Icon | Purpose |
|---|---|---|---|
 |
Enable Advanced Digitizing Tools |  |
Enable Tracing |
 |
Undo |  |
Redo |
 |
Rotate Feature(s) |  |
Simplify Feature |
 |
Add Ring |  |
Add Part |
 |
Fill Ring | ||
 |
Delete Ring |  |
Delete Part |
 |
Offset Curve |  |
Reshape Features |
 |
Split Parts |  |
Split Features |
 |
Merge Attributes of Selected Features |  |
Merge Selected Features |
 |
Rotate Point Symbols |  |
Offset Point Symbols |
Lets try a few of these tools and see how they work.
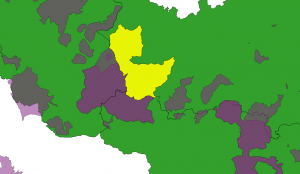
For example if we want to split an polygon (in our case an area represented by a protected area), after a certain limit (a administrative unit limit) we will proceed and use the Split Features tool along with Trace tool. The polygon will be split in 3 parts according to the next image.
![]()
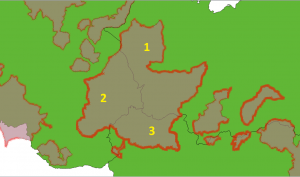
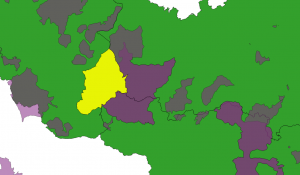
Clicking on the Trace and Split Features buttons and having the snapping tolerance set we can proceed and split the polygon according to the administrative limits.
With the trace tool activated follow the administrative unit limit.
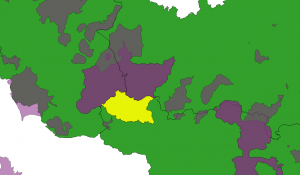
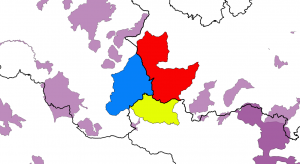
At the end you should have three separated polygons. Each polygon was split according to the administrative area.
Quality training taught by professionals
RECOMMENDED COURSE


HI TYC GIS,
I would like to know, how is possible to copy from the vertex editor, the (X,Y) coordinates of a line layer, into another vertex editor’s line layer.
Cheers,