In ArcGIS Pro you cannot open or add LAZ (.laz) files directly and display the point cloud data on the map. The LAZ (.laz) files need to be decompressed and converted to LAS (.las) files.
One easy way to do that is to use the LASzip, a free open source product of rapidlasso GmbH. The LASzip library is built into the LAStools, and while the LAStools is commercial software, the LASzip is available as an LGPL-licensed stand-alone software library.
*Keep in mind that the LAStools need to be installed on your computer. An easy way to do that is to go and download it by using the Direct link to LAStools.zip. Unzip the file to find the LASzip application in the bin folder.
Launch LASzip and follow the steps described in the image below.
We have 24 LAZ (.laz) files depicting the area around Toledo city (south of Madrid). The files are LIDAR-derived 3D point clouds colored in true colors (RGB).
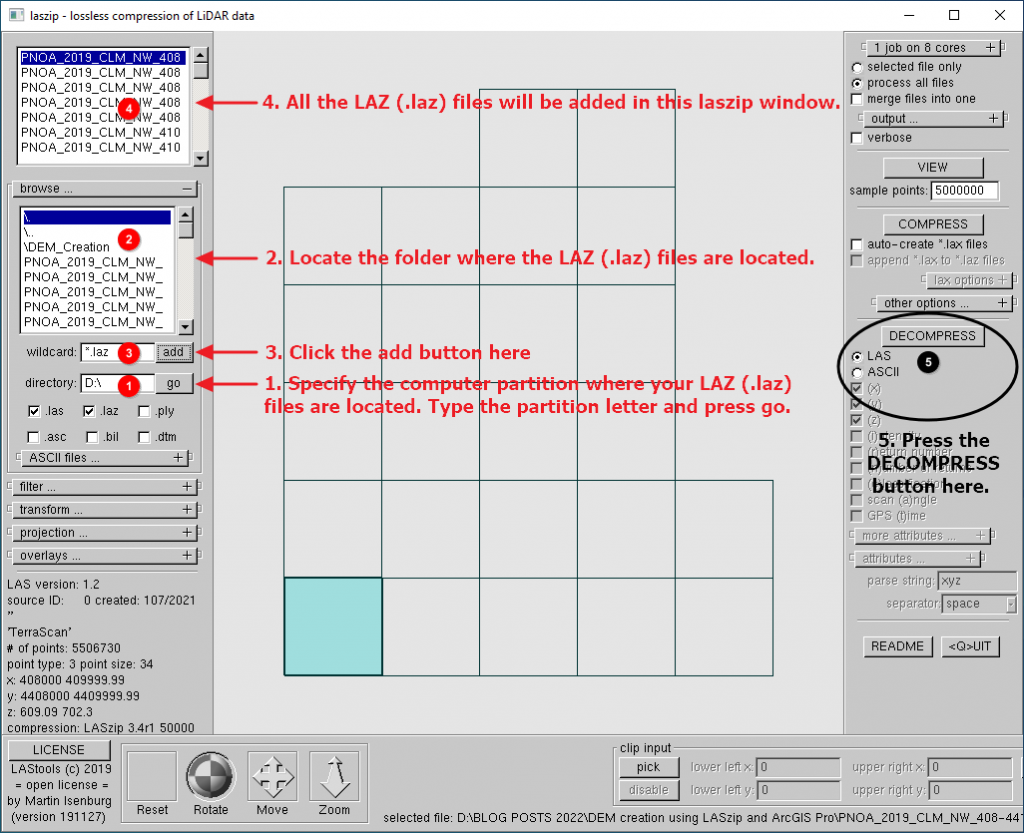
A new window will appear after you click the DECOMPRESS button.

Click Start.
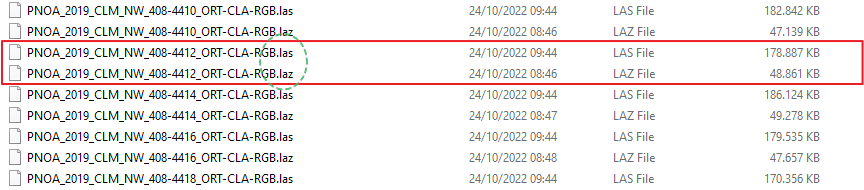
Once the decompression process is complete, navigate to the location of the LAZ (.laz) files in your Windows environment. You’ll notice that a new LAS (.las) file was created for each LAZ (.laz) file (with the same name).
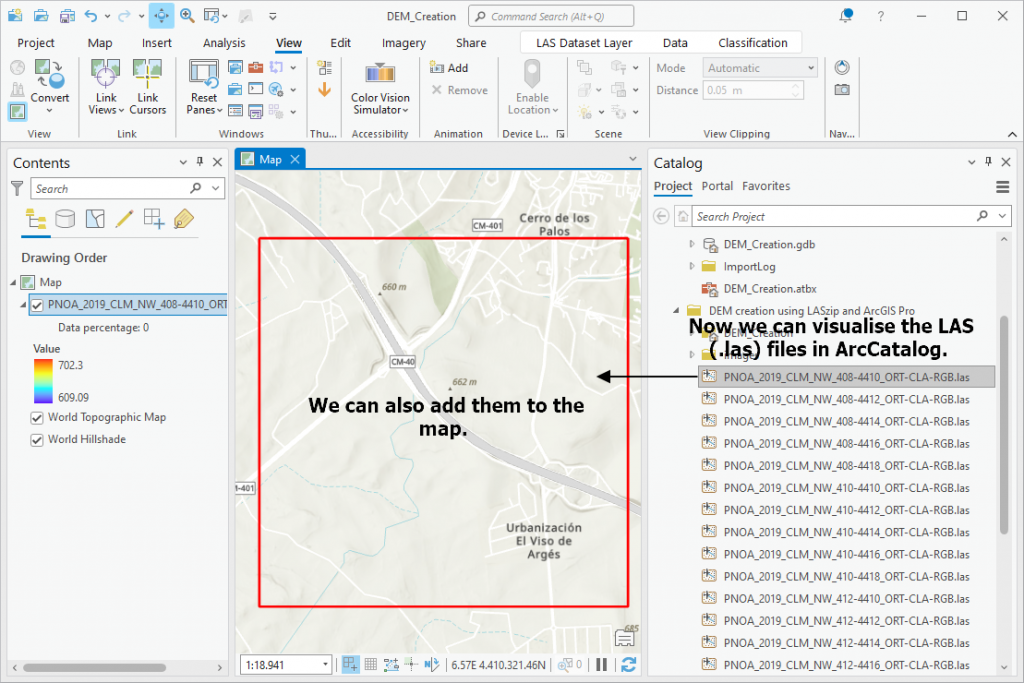
Now we can work (open or add the LAS (.las) files) directly in ArcGIS Pro.
Open a new ArcGIS Pro project.
To work with all the LAS (.las) files at once we need to create a LAS dataset using the Create Las Dataset tool.
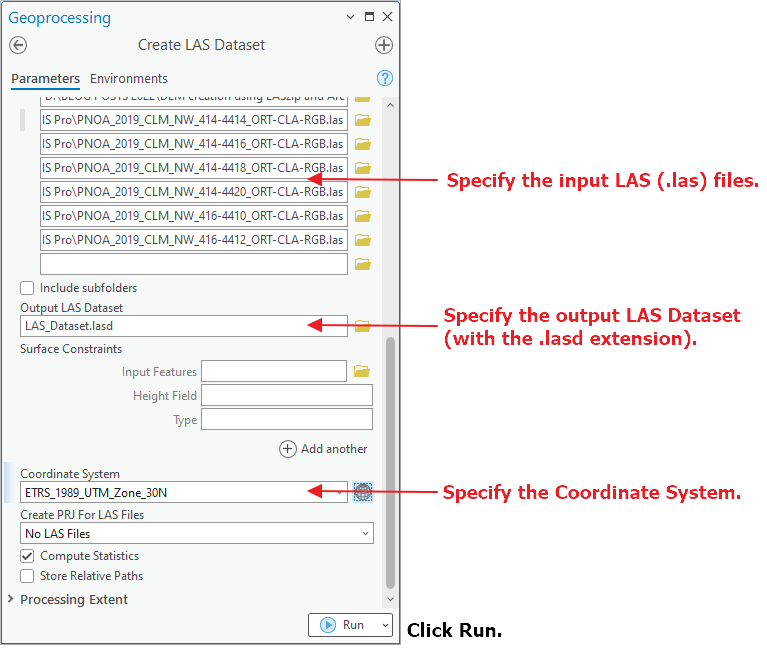
The LAS Dataset is created. A LAS dataset keeps track of one or more LAS files located on disk.
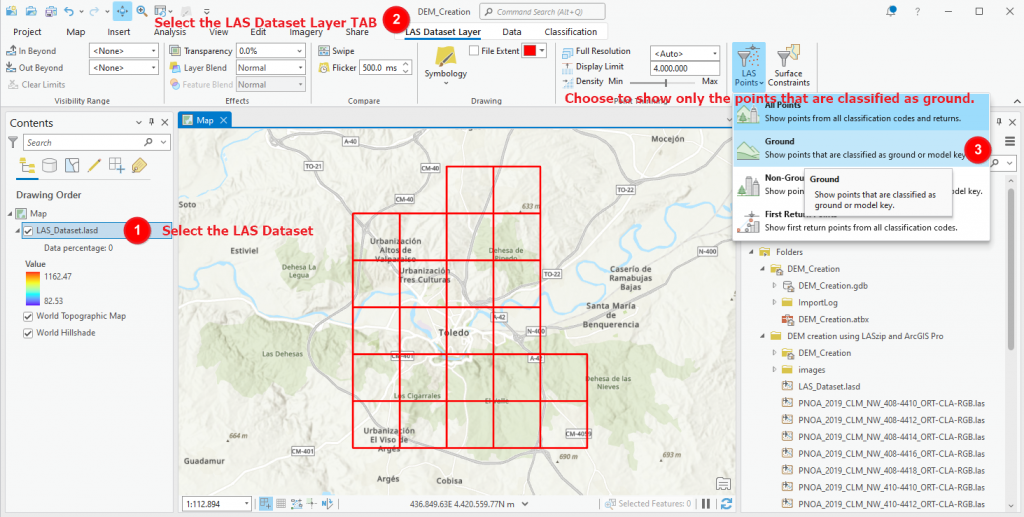
Next, select the option to filter the 3D cloud points and display only the ground points. Follow the instructions in the image below.
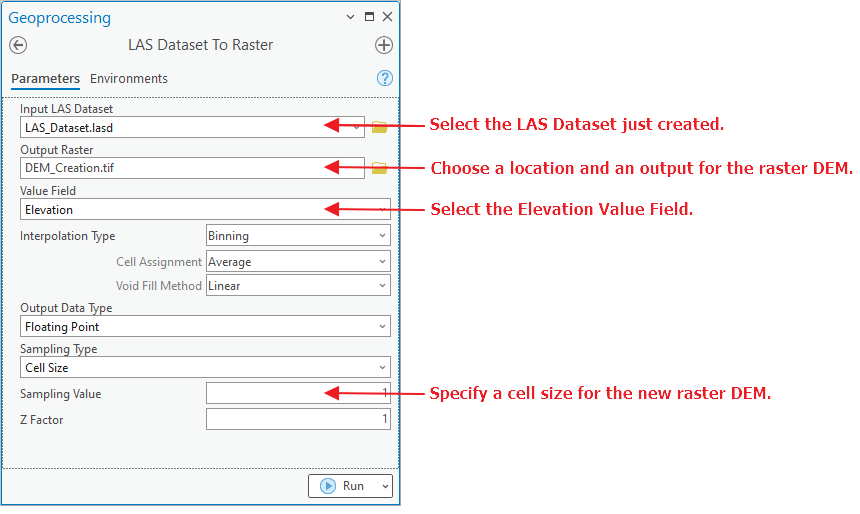
Now, with only the ground points displayed, we can proceed and create a DEM for the area. Access the tool LAS Dataset To Raster.
The DEM is created.
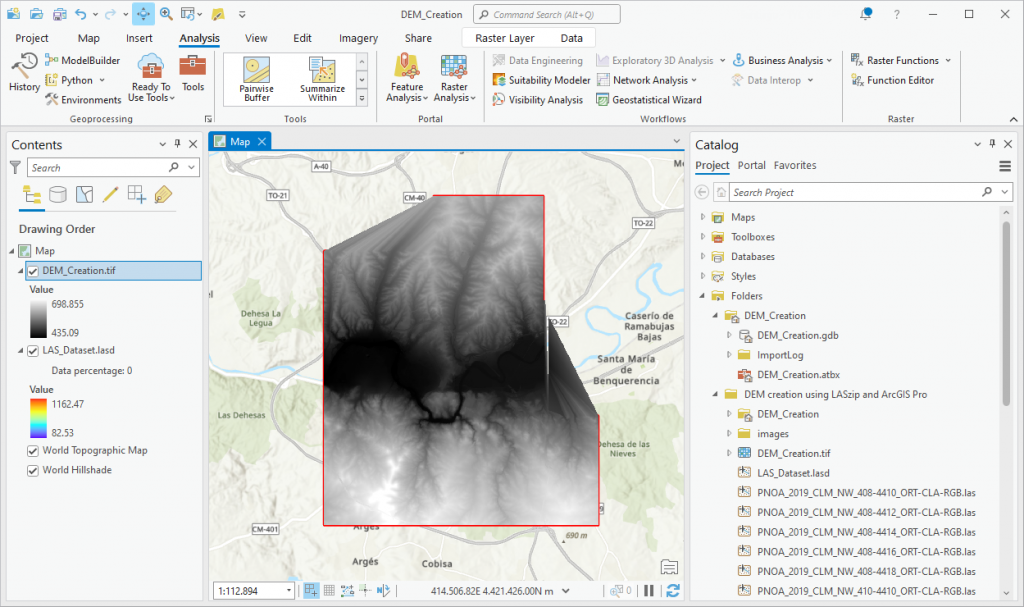
Specify a proper symbology.

High quality and professional training
Recommended courses


Leave A Comment