This geodatabase feature allow us analyse vector networks and find out if there are errors on them to be able to fix them afterwards. With this we can, for example, carry out a more exact analysis or create routes without finding an error. What this feature does is find errors in the layer (or group of layers) of the network analysis.
To do so, we need to first have a geodatabase. To create it, right click the folder where we want to locate it inside Catalog and select new > file geodatabase. This is a container where we can save the folders.

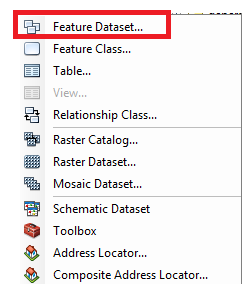
We also need to generate a file inside the geodatabase called “Feature Dataset”.
Right Click the geodatabase, New > Feature Dataset. Here you will be asked to indicate the projection of the layers that will be inside it.
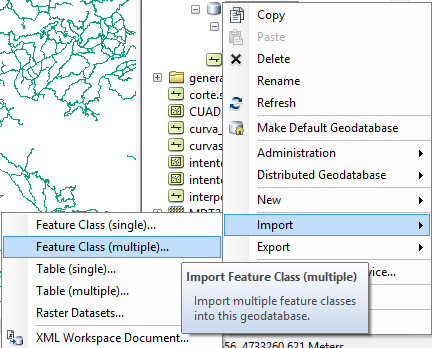
We now have to import the layer(s) that we want to analyse. To do this, right click Import (I recommend the “multiple” option even though we just want to introduce one layer as it is less arduous).
Once imported, add the layer inside feature dataset.
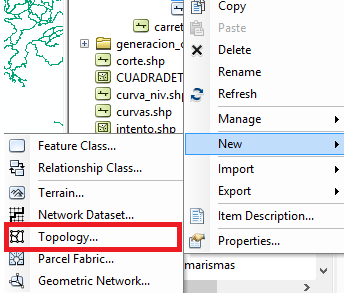
With the layer inside it, right click Feature Dataset > New > Topology.
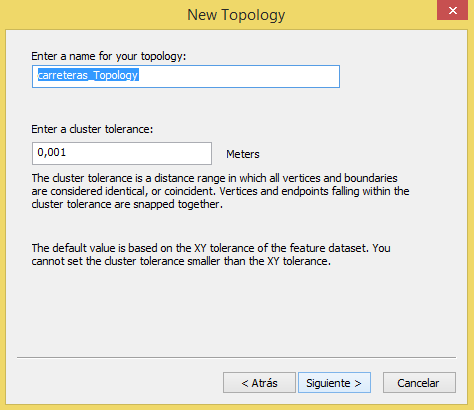
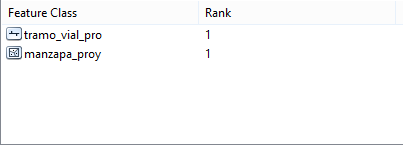
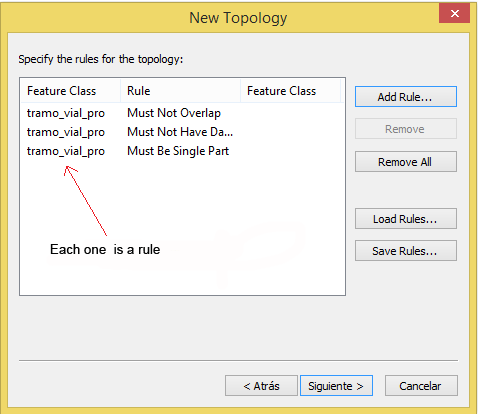
Name the topology and specify the tolerance distance (generally it is 0,001 unless you are looking for something specific). The next window will ask to select the layer and assign a range of importance to the layer (if you want it to be the same, give it the same number).
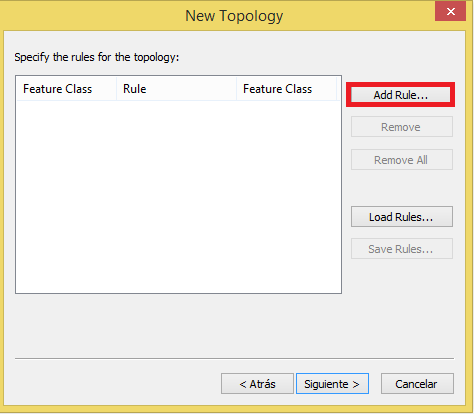
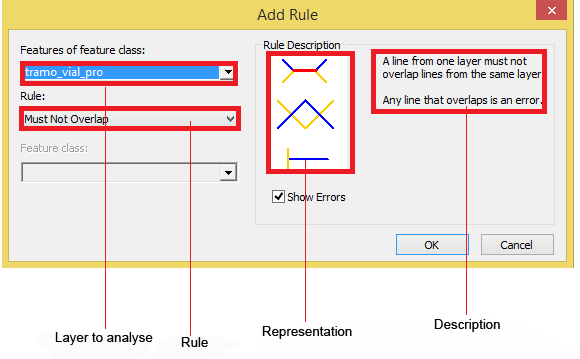
“Add rule” is to add mnemonic rules that will be followed.
On the right hand side you will see a description and the drawing explaining the meaning of each rule. Once done, click finish.
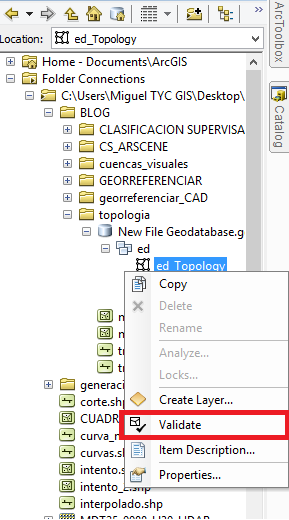
When finished, the topology image will be added inside feature class and we have to right click it to validate it.
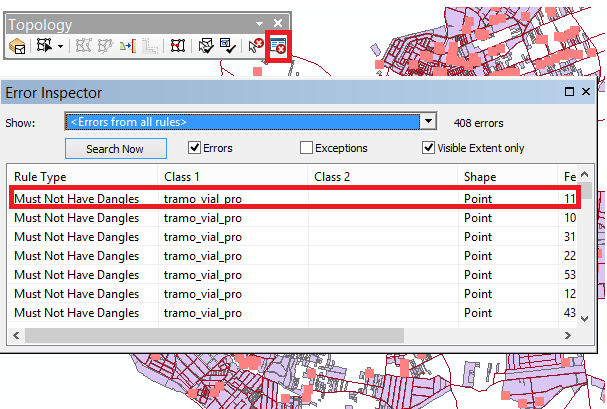
To validate and analyse the errors that may exist, we, first of all, have to activate the topology tool.
Next, we have to load the file created in the table of contents. It will ask us if we want to add layers that belong to the topology, we will say yes so that the errors on the map are loaded.
Following, the editing will start (same as editing any layer, right click on it, select edit and modify it using the editor tool) taking a look at the pointed errors.
Something to take into account is that, although you correct the error, the layer of errors (red) is there, and it won’t change until we review the errors. The reason for this is that the red vector layer is a copy of the previous one but with the error re-marked.
If the “Topology” control table is not open, you will have to open it via customize.
In the “error inspector” table we can observe each individual error as if it was an attribute table allowing us to work with them. This opens clicking the “error inspector” button of the topology tool.
If there is some point that we want to omit as an error, we just have to right click on it and select “Mark as exception“.

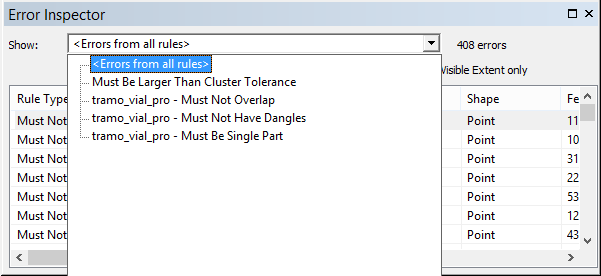
With the bar above, we can choose to only display the errors created under a certain rule.
Once we have solved the error, we select the “seach now” button of the “error inspector”. This way we save the editing of the layers until having corrected all errors.
Quality training taught by professionals
RECOMMENDED COURSE


Leave A Comment