Would you like to build an useful application in your mobile device using ArcGIS? Don’t worry, it won’t take long to discover the best features in one of the most powerful GIS platform.
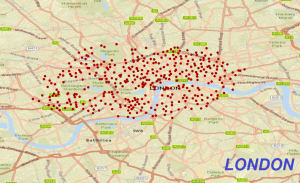
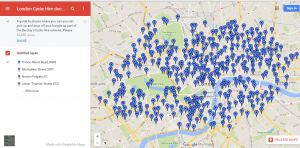
In this post, we are going to use an example with the Bike Stations of London, preparing a layer from a KML (creating a new symbology and saving it in a new style) and upload it to ArcGIS Online and then, use it in Collector for ArcGIS.
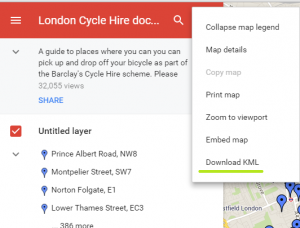
First, we have to look for a layer on Google. This layer is in KML format, so in ArcGIS we proceed to change that format to a .lyr format. The next image shows how to download a KML layer from Google (if you didn’t know it before).
Select the menu (right side of the red tectangle) and Download KML.
When the download is finished, save it in a folder to know its correct location. For example, create a New Folder and call it “Example Collector” .
Open ArcGIS and search for the “KML to Layer” tool in the Search Window.
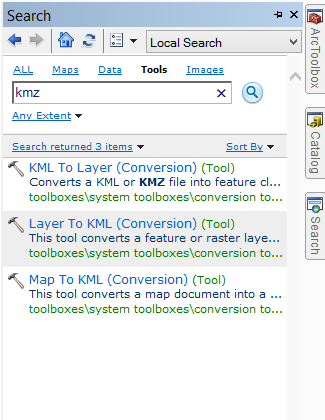
This tool can convert a KML input into a layer feature, including the creation of a geodatabase with every feature of the KML layer. But what we are going to use is the layer. Fill all the boxes in the tool, as the next image shows:
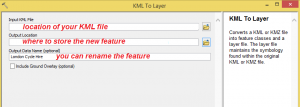
When the Geoprocess has finished successfully, you will see the same point symbols and labels as you saw in the KML layer.
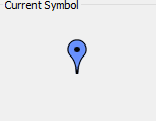
We will change now the symbology: As we did in our previous post, we use an image for the symbol. And then, we want to save it in a New Style. But first, what is a Style?
Symbology won’t be stored in your feature configuration, it’s only in the map memory. This means that when you close ArcMap, you loose the symbology configuration.
Then, you will have to store the symbology into a Style file, called “.style”. You can also organise symbols of the style using the Style Manager, and, because you use a file, you can share it. ArcGIS provides a number of styles that can be used to meet a certain specification or achieve a certain look for your maps. These are the default, but you want to create new styles to customize your maps:
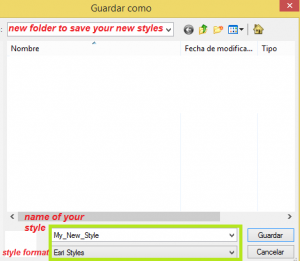
Now, go to Style References from the Symbol Selector, and select Create New Style. Then a new window pops up, like a “Save As” window. Name your new Style as you want (in this example, My_New_Style) and click on Save.
And it will appear in your Style Reference List. But uncheck the box on its left (see next image), for the following process:

Click OK and now select Save As. A new window will ask you for some settings The Style option has to be the output location of your new style.
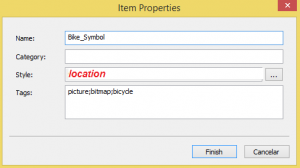
Click Finish.
You can manage your Style File from the Style Manager. Click on Customize, on the top of the tool bar, and Style Manager.
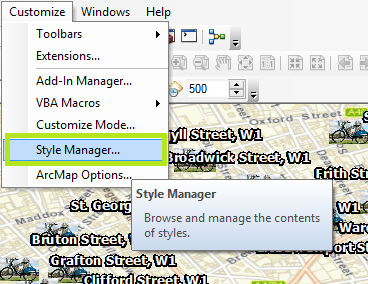
Explore all the folders in that window. You will see all the categories that can be stored in the same Style Folder.
Once our layer is symbolized correctly, we will be ready to upload it to ArcGIS Online.
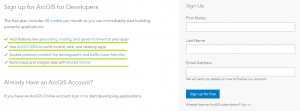
Don’t you have an account? It is time create it, because you will have many advantages. Go to ArcGIS for Developers and Sign Up for Free:

Look at all the benefits of having this kind of account and fill the requirred fields:
Once you have created it, go to ArcGIS.com and sign in with your already created account. You will be in the ArcGIS Online main window.
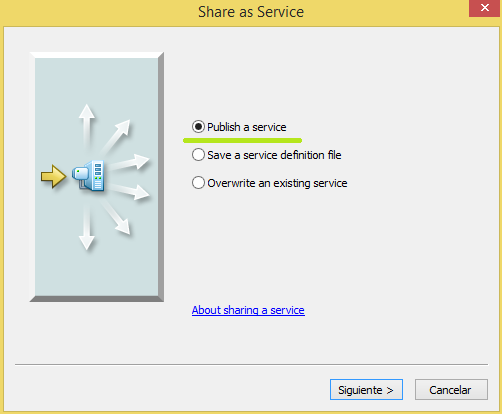
Go to ArcMap and sign in again. Click on File and then Sign In. You are ready to publish your features, by clicking on File and Share As.
The sharing wizard will start. Follow these steps:
1. Click on Publish a service.
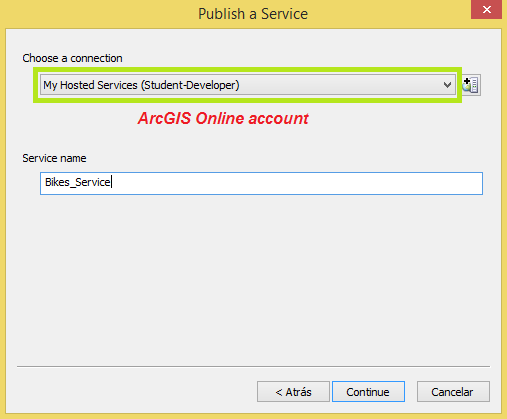
2. The next panel requires a Service name (what you want; this example will use “Bikes_Service”) and to choose a Connection (ArcGIS Online account).
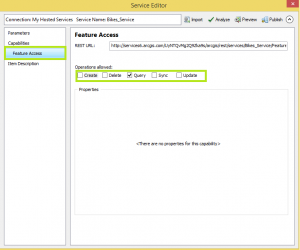
3. Select, on the left panel, Capabilities. Choose Feature Access and uncheck Tile Mapping.
4. In Feature Access properties (select Feature Access on the left panel) check all the properties (Create, Delete, Query, Sync and Update).
5. Click on Item Description and fill all the required fields (access and use constrains and credits fields are not required).
6. Click on Publish, situated up-right on the window. If an error message pops up, it can be because of the Basemap. Remove it from your Table of Contents.
Now, you will see your map in your contents, selecting My Contents in your ArcGIS Online page
![]()
Click on the arrow (next to “Feature Layer”) and choose Add to New Map. You are able to do many things within your map, but by now, we are going to Save As and fill the required fields, then we select Share. We can share it to everyone or among your organization. Choose the latter. Now, the map you have created in ArcMap is ready to use from your Mobile Phone Device with Collector for ArcGIS.

You can download it from Play Store.
Install it and Sign in with your ArcGIS for Developers account (you had to choose previously the URL to your ArcGIS Online site. It is your user’s name followed by “maps.arcgis.com”). And you are in, your Map should be shown in your All Maps menu.
You might have more ideas while having your lessons in our ArcGIS courses in TYC GIS trainning. Furthermore, you will be able to add more functionality to Collector for ArcGIS by learning how to create domains and subtypes and classify your features correctly; and the best capability of Collector: attach pictures to your new features, activating this ability from ArcMap. This will provide photos to your features, taking them in the same place where you are.
This application runs online as well as offline.
Quality training taught by professionals
RECOMMENDED COURSES


Leave A Comment